
Although Im seeing great progress, I thought I’d document what I think still has to happen by the time this thing is finished; might help me identify some less important items that can wait…
WHAT’S LEFT TO DO? 3 November 2009
There is a myriad of details as well as some major events. Daniel drops them into the conversation as easily as day turns to night, but Im trying to keep up...
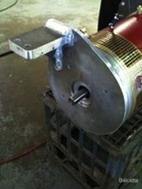
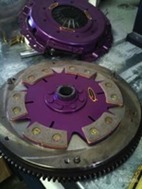
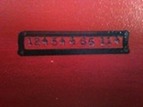
Motor (rear): Final engine mount is fabricated -pic 1- and once the new clutch arrives back -pic 2- it will be slipped in and the lot bolted back in for the final time. Daniel stamped the serial number of the engine onto the underneath -pic 3- why? So it can be read during the vehicle inspection, of course! The ‘real’ serial # is printed on a sticky label which is only visible on the top of the motor, will be obscured by a battery box, and can wash off. Next of course it needs to be wired to the controller, and a contactor (monstrous relay to switch the 144V power on/off)
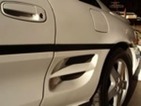
Controller (rear): When it arrives, the Zilla 1kA controller needs to be as near the motor as possible, so it will go in the back compartment. But it has a water cooler switching all that current, so where does the radiator go? Pic 4 shows a rear air inlet, which is the obvious place.
The controller needs to be wired to all the….
Batteries (in boxes, 1 under, 1 rear): In two boxes, one in the tunnel under the car; t’other above the motor at the back. They all need to be wired together with substantial cables; and the boxes sealed so no-one can electrocute themselves carelessly.
Battery ‘gauge’ (dash): So you can see what condition the battery is in, and not run it below the 20% or 30% of full capacity - bad for them.
Battery charger (front): Battery management is critical to their long life, and this involves a circuit board (battery management module or BMM) on every battery to stop any being overcharged when the rest are still going. This charger generates heat and already has two fans, but only when you are stationary and plugged in. That means to front bay can fill with heated air, so we’ll fit some 10cm exhaust fans in that front compartment to keep the air moving during charging, so it doesn't get too hot..
DC-DC converter (front): will keep the tiny 12V battery charged so that the traditional electrics continue, headlights, wipers etc.
Air conditioner (front): Electric, with reverse-cycle switch to provide demisting/heating as well as cooling. If this works it will mean not having to pull the whole dash out to put an electric air heater in place of the old water one.
Electric brake booster pump (front): Hopefully a quiet one; gotta keep those brakes working.
Details: Converting the fuel gauge -pic 5- to now respond as the battery gauge will be great but I think that is going to be what our architect years ago called an FO - future option; its not just a matter of noting the voltage, apparently. Then there is the current battery meter, engine tacho (yes please, although a rev limiter is important in DC motors... you can cook them by pressing too hard in the throttle just once!); even keeping track of the number of charge cycles is important. And this list hasn't covered the need for warning decals, safety cutouts, restoring remote locking, signage/paintwork saying “I’m electric, catch me if you can” :-) and what about the old stereo/tape player? Time for am mp3 player? And those two huge exhaust pipes we took off? Should I put them back with a white LED inside or something? What do you think? Anything I’ve missed?